This step-by-step guide on troubleshooting a vacuum cleaner plug issue provides practical solutions for addressing common problems that may arise. It outlines the essential steps to diagnose issues such as a faulty plug, damaged cord, or electrical problems, helping you to identify the root cause of the malfunction. By following this guide, you can effectively determine whether the issue is with the plug itself or other components, enabling you to make necessary repairs or replacements. Ultimately, this knowledge can save you both time and money, ensuring your vacuum cleaner operates efficiently and reliably.


Check that the vacuum cleaner is securely plugged into a working outlet. If it’s not properly connected, push the plug firmly into the socket. Next, test the outlet by plugging in another device, such as a lamp or phone charger. If the other device functions correctly, the outlet is providing power.
If the second device does not work, inspect the circuit breaker or fuse box for any tripped breakers or blown fuses. Reset any tripped breakers by flipping them back to the “on” position. If necessary, replace any blown fuses with new ones of the same rating. After ensuring the outlet is working, return to your vacuum cleaner and check if it powers on.

Inspect the Power Cord
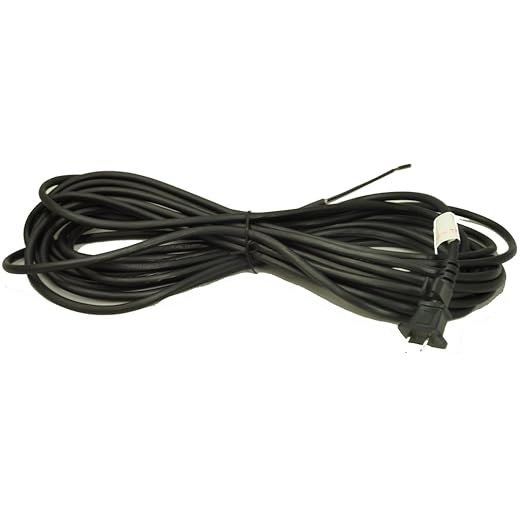
Examine the vacuum cleaner’s power cord for any visible damage. Look closely for frays, cuts, or kinks that could affect its performance. A damaged cord can prevent your vacuum from receiving the power it needs to operate effectively.
- Inspect the entire length of the cord, from the plug to the vacuum.
- Check for any exposed wires or discoloration that may indicate wear.
- Feel the cord for any lumps or inconsistencies that suggest internal damage.
- If you find any issues, avoid using the vacuum until the cord is replaced or repaired to ensure your safety.
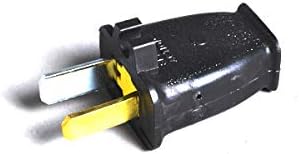
Examine the Plug
Inspect the plug closely for any signs of damage or corrosion. Check for cracks, fraying, or any discoloration that might indicate wear and tear. If you notice any issues, consider replacing the plug to avoid potential hazards.
Ensure the prongs are straight and clean. Look for any dirt or debris that could obstruct a secure connection. If you see any buildup, gently wipe the prongs with a dry cloth. For stubborn grime, use a slightly damp cloth but make sure to dry it thoroughly afterward. A clean and intact plug is crucial for safe and efficient operation.
Check the Circuit Breaker
Check your home’s circuit breaker or fuse box if your vacuum still does not turn on. Locate the circuit breaker panel, which is usually found in a basement, garage, or utility room. Open the panel and look for any breakers that are in the “off” position or appear to be tripped. Reset any tripped breakers by flipping them back to the “on” position.
If your home uses fuses instead of breakers, inspect the fuse box for any blown fuses. A blown fuse often has a broken wire or a darkened glass window. Replace any blown fuses with a new one of the same amperage. After resetting breakers or replacing fuses, try turning your vacuum on again to see if it works properly.
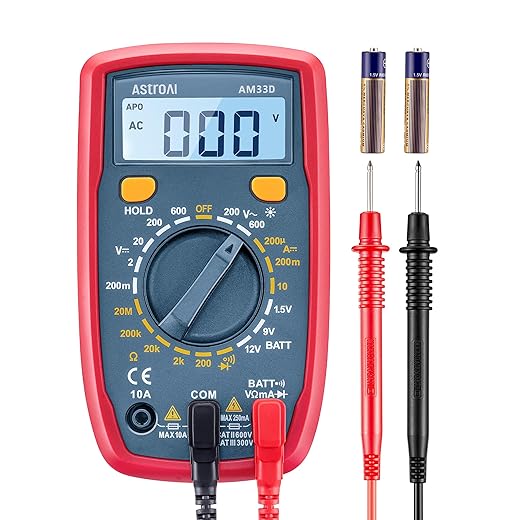
Use a Multimeter
Use a multimeter to test the voltage at the plug for a more in-depth analysis. This step is crucial to determine whether the issue originates from the plug or the vacuum cleaner itself. Follow these straightforward steps:
- Set the multimeter to the AC voltage setting, typically indicated by a “V~” symbol.
- Insert the probes into the corresponding slots on the multimeter. The black probe goes into the COM (common) slot, while the red probe goes into the VΩ slot.
- Plug in the vacuum cleaner and ensure it’s switched on. Be cautious and avoid touching the metal parts of the probes.
- Touch the black probe to the plug’s ground (the larger slot) and the red probe to the live slot (the smaller slot).
- Read the multimeter display. A typical voltage reading for household plugs is around 120 volts in the U.S. If the reading is significantly lower than this, the problem likely lies with the plug or the electrical circuit.
- Repeat the measurement by switching the probes if necessary, ensuring you get a consistent reading.
If you find that the voltage is normal at the plug but the vacuum isn’t functioning, the issue may be within the vacuum itself. For example, a damaged cord or malfunctioning motor could be the culprit.
Seek Professional Help
Consider enlisting a professional repair technician if you’ve meticulously worked through all troubleshooting steps and your vacuum is still underperforming. A trained expert can provide a thorough diagnosis that you may not be able to achieve on your own. They possess the experience and tools necessary to identify issues that are not immediately visible, such as electrical problems or internal component failures.
Gather essential information before contacting a technician:
- Note down the vacuum model and serial number.
- Describe the issues you’ve encountered clearly, including any unusual sounds or smells.
- List all the troubleshooting steps you have already attempted.
These details will help the technician understand the problem quickly and prepare for the repair. For example, if you’ve noticed that the vacuum loses suction after a few minutes of use, mention this as it could indicate a blockage or a motor issue. By preparing ahead, you ensure that the repair process is as smooth and efficient as possible.
Final Tips for Resolution
In conclusion, tackling a vacuum cleaner plug issue doesn’t have to be daunting. By systematically checking the power source, inspecting the cord and plug, verifying the circuit breaker, and utilizing a multimeter, you can often pinpoint the problem yourself. Should you encounter persistent issues, don’t hesitate to reach out for professional assistance. With these troubleshooting tips in hand, you can get your vacuum cleaner back to work and keep your space clean and tidy!
Essential Equipment Checklist


Essential Solutions
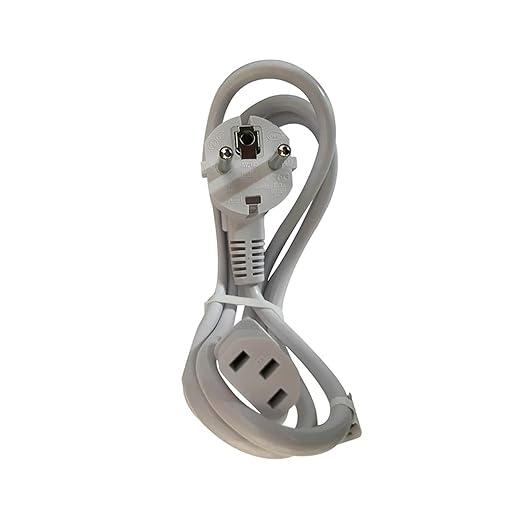
Step-by-Step Guide to Safely Replace Your Vacuum Cleaner Plug
- Unplug the Vacuum Cleaner: Before you start, ensure the vacuum cleaner is unplugged from the electrical outlet to avoid any risk of electric shock
- Remove the Old Plug: Use a screwdriver to open the casing of the plug. Carefully take out the old wiring, noting how the wires are connected (you might want to take a photo for reference)
- Prepare the New Plug: Get a replacement plug that fits your vacuum cleaner’s specifications. Strip the ends of the wires if needed, so they’re ready to connect
- Connect the Wires: Attach the wires from the vacuum cleaner to the corresponding terminals in the new plug. Typically, you’ll have a live wire (brown), a neutral wire (blue), and a ground wire (green/yellow). Make sure they are securely fastened
- Close the Plug and Test: Once connected, close the plug casing tightly and ensure there are no exposed wires. Plug the vacuum cleaner back in and test it to ensure everything is functioning properly
- Remember, if you’re ever unsure or uncomfortable with the process, it’s always a good idea to seek help from a professional!
How to Safely Replace Your Vacuum Cleaner Plug
To determine the correct voltage and amperage for a replacement plug, you can follow these steps:
- Check the Device Label: Most electrical devices have a label or a nameplate that specifies the required voltage (V) and amperage (A). This label is usually located on the bottom or back of the device.
- Consult the User Manual: If you have the user manual for your device, it will typically include specifications for the plug, including voltage and amperage requirements.
- Look for Manufacturer Specifications: Visit the manufacturer’s website or contact their customer support for detailed specifications related to your specific device.
- Use a Multimeter: If you’re unable to find the required specifications, you can use a multimeter to measure the voltage and current being supplied to the device when it’s plugged in. Make sure you follow safety precautions while performing this.
- Consider the Application: If the plug is for a specific application (like appliances, tools, etc.), ensure that the replacement plug is suitable for that application. For instance, heavy-duty tools may require higher amperage than standard household appliances.
- Voltage and Amperage Ratings: When selecting a replacement plug, ensure that its voltage rating meets or exceeds that of the device. For amperage, choose a plug that can handle at least the same amperage as indicated on your device. It’s often safer to select a plug with a higher amperage rating to prevent overheating.
By following these steps, you can ensure that you find a replacement plug that will safely meet the electrical needs of your device.
I adapted the steps a bit; for my Electrolux, I used duct tape to secure a loose power cord instead of replacing it immediately. It worked fine for now! 😅
Any advanced tips for using a multimeter? I have a Craftsman multimeter but never used it on my vacuum before. What should I look out for?
Absolutely! When using a multimeter, you want to check for continuity in the power cord and the plug. If you’re unsure, feel free to reach out, and we can guide you through the process!
I think you should add some tips on how to clean the vacuum after troubleshooting! Like, what can we do to keep it in good shape after fixing issues?
Great idea! We’ll definitely consider adding maintenance tips in future articles. Keeping your vacuum clean is just as important as troubleshooting!
This guide is super helpful! Can you also cover maintenance tips for different vacuum types? Like, what’s the difference in troubleshooting for a Dyson versus a Hoover?
I followed your steps and found that the power cord on my Bissell CleanView was frayed. I replaced it, and now it works like new! Thanks for the clear guidance! 🎉
Hey, I tried checking the power source, but my Shark Navigator just won’t turn on! Any tips on what to do if the outlet seems fine but the vacuum still doesn’t work? 🤔
Hi! If the outlet seems fine, you might want to try a different one just to rule it out. Sometimes, it could be a subtle issue with the outlet itself. Also, ensure nothing’s tripped or blocked in the vacuum! Let us know how it goes!