This step-by-step guide provides a comprehensive overview of how to replace the bag in a canister vacuum, a crucial maintenance task that helps keep the vacuum running efficiently. The process entails gathering the necessary tools, locating the vacuum bag compartment, carefully removing the old bag, and installing the new one securely. By following these straightforward instructions, you can ensure your canister vacuum continues to perform at its best, maintaining its versatility and effectiveness on various surfaces.


Gather your new vacuum bag, ensuring it’s the correct type for your vacuum model. Grab a pair of scissors in case you need to open the packaging of the new bag. Keep a clean cloth handy to wipe away any dust or debris from the vacuum’s interior before you proceed. Having these materials ready will make the process smooth and efficient.

Turn Off and Unplug the Vacuum
Turn off the vacuum cleaner by locating the power switch and pressing it to the off position. Unplug the vacuum from the electrical outlet by grasping the plug firmly and pulling it straight out, avoiding any jerking motions. This step is crucial to ensure that the vacuum doesn’t accidentally turn on while you’re replacing the bag. For added safety, consider moving the vacuum to a different area away from any foot traffic to eliminate any distractions during the process.
Locate the Vacuum Bag Compartment
Locate the vacuum bag compartment, which is usually found at the rear or top of your vacuum canister. Open your vacuum’s user manual and find the section that details the bag replacement process for precise guidance. Examine the designated area closely; you may need to unlatch or twist a cover to access the compartment. Once open, you can easily remove the old bag and replace it with a new one.
Remove the Old Vacuum Bag
Carefully lift any latch or unlock the compartment holding the old vacuum bag. Gently pull the bag straight out, ensuring a steady motion to minimize dust escape. Hold the bag upright to contain any debris, and avoid shaking it as you remove it from the vacuum. If necessary, do this in a well-ventilated area or over a trash bin to catch any dust that might be released.
Dispose of the Old Bag Properly
Seal the old vacuum bag in a plastic bag to prevent dust from escaping.
- Carefully remove the vacuum bag from the vacuum cleaner, ensuring you don’t shake it too much to minimize the release of dust.
- Place the used vacuum bag inside a sturdy plastic bag, such as a kitchen trash bag or a reusable grocery bag, and seal it tightly. This step is crucial as it contains allergens and dust, keeping your home environment clean.
- Dispose of the sealed plastic bag in your outdoor trash bin.
This simple process helps maintain a healthier atmosphere by preventing dust and allergens from circulating back into your living space. For example, if you have allergies or asthma, sealing your vacuum bag can significantly reduce irritants in your home.
Prepare the New Vacuum Bag
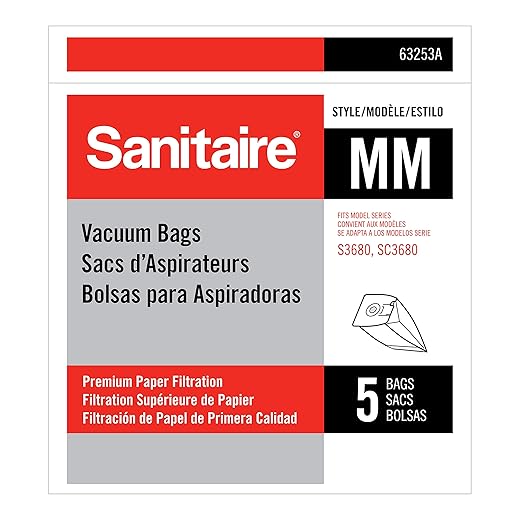
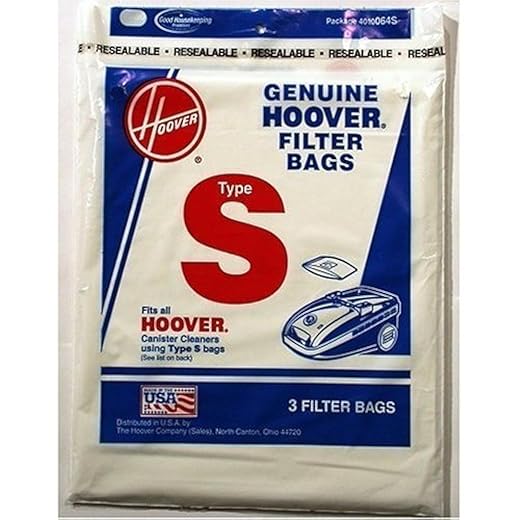
Unpack the new vacuum bag carefully, ensuring to remove any protective packaging. Verify that the bag fits the model of your vacuum by checking the packaging or the manufacturer’s instructions. Look for labels or model numbers on both your vacuum and the bag to confirm compatibility; for example, if your vacuum is a Hoover WindTunnel, ensure the bag is specifically designed for that model. Read any specific installation instructions that may be included with the new bag, as some bags may require unique handling or attachment methods.
Insert the New Vacuum Bag
Align the new vacuum bag with the compartment, ensuring that the openings match perfectly. Gently insert the bag into place, applying slight pressure if necessary. Check that it fits securely and that any locking mechanisms click into position. Confirm that the bag is firmly in place to prevent it from coming loose during use.
Close the Compartment and Clean Up
Close the compartment securely by pressing it until you hear a click, ensuring the new bag is properly in place. Wipe any dust or debris from the vacuum’s exterior and surrounding area using a clean cloth, making sure to cover all surfaces. Pay special attention to crevices and corners where dirt tends to accumulate, keeping your vacuum looking fresh and ready for the next use. This simple maintenance step helps prolong the life of your vacuum and enhances its performance.
Final Steps for Replacement
In conclusion, replacing the bag in your canister vacuum is a simple yet crucial task that can greatly improve its suction power and overall efficiency. By regularly changing the bag, you not only maintain a cleaner home but also extend the lifespan of your vacuum. Remember to follow the steps outlined in this guide, and you’ll be well on your way to a more effective cleaning routine. Happy vacuuming!
Essential Supplies Needed

Effortless Bag Replacement
Mastering the Art of Canister Vacuum Operation
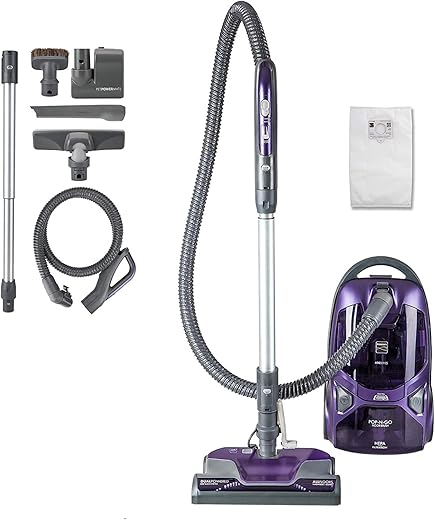
- Familiarize Yourself with the Components: Before you start, take a moment to understand the parts of your canister vacuum—this usually includes the hose, wand, brush attachments, and the dust container. Knowing how to assemble and disassemble these parts will make your cleaning routine smoother
- Choose the Right Attachment: Depending on the surface you’re cleaning, select the appropriate attachment. For carpets, use the brush head; for hard floors, opt for a hard floor nozzle. If you’re tackling upholstery or drapes, use the upholstery brush to ensure effective cleaning
- Adjust the Suction Power: Many canister vacuums come with adjustable suction settings. For delicate fabrics or surfaces, lower the suction to prevent damage. For carpets and rugs, you can increase the power for a deeper clean
- Work in Sections: Divide the area you’re cleaning into sections. Start from one corner and work your way across the room. This helps ensure you don’t miss any spots and allows you to manage cords easily without tangling
- Regular Maintenance: After each use, empty the dust container and check the filters. Keeping your vacuum well-maintained will ensure it runs efficiently and lasts longer, making your cleaning routine more effective over time
- Happy cleaning!
Everything You Need to Know About Canister Vacuums
Canister vacuums can be effective on both carpets and hard floors, but their performance may vary based on the specific model and its attachments. Generally, canister vacuums are often praised for their versatility and ability to reach into corners and under furniture, making them great for hard floors where debris can accumulate.
On carpets, canister vacuums can also perform well, especially if they have a motorized brush roll attachment designed for deep cleaning. This allows them to agitate carpet fibers and pick up dirt and pet hair more effectively. However, some upright vacuums might be more powerful for deep pile carpets, as they often have stronger suction and more specialized features.
Ultimately, the effectiveness of a canister vacuum on carpets or hard floors depends on the specific vacuum’s design and the accessories you use. If you have both surfaces in your home, look for a canister vacuum that includes options for both carpet and hard floor cleaning to maximize your cleaning efficiency.
Yes, there are several brands that are well-known for their canister vacuums and have built a reputation for quality and performance. Some of the most recognized brands include:
- Miele: Known for their high-quality engineering and durability, Miele canister vacuums are often praised for their powerful suction and long lifespan. They offer various models tailored for different needs.
- Dyson: While more famous for their upright vacuums, Dyson also offers canister models that feature innovative design and technology, including bagless options with strong suction power.
- Bissell: This brand provides a range of canister vacuums that are budget-friendly and effective, making them a popular choice for many households.
- Shark: Shark offers versatile canister vacuums that are known for their user-friendly designs and strong cleaning performance, often featuring innovative attachments for various surfaces.
- Hoover: With a long history in the vacuum industry, Hoover produces reliable canister vacuums that are generally well-reviewed for their cleaning efficiency and affordability.
When choosing a canister vacuum, consider your specific cleaning needs, budget, and preferences for features to find the best option for you!
Yes, canister vacuums can be effectively used for cleaning upholstery and drapes. Many canister vacuums come with specialized attachments, such as upholstery brushes or crevice tools, which are designed to reach and clean fabric surfaces without causing damage. The versatility of canister vacuums allows you to easily maneuver around furniture and reach high or awkward areas, making them a great choice for maintaining the cleanliness of your upholstery and drapes. Just be sure to check if your specific model includes the necessary attachments for optimal results.
I’ve found that keeping a few extra vacuum bags handy really makes things easier. I usually order mine from Amazon in bulk. What are some good brands you all recommend? I’ve tried the Hoover Type A bags and they work well!
This guide is super helpful! I recently switched to a Miele Classic C1 vacuum, and I found that the bags are a bit different. Anyone else using this model? Would love to hear tips on bag changes or maintenance!
Totally agree about having extra bags! I use the Shark Navigator Lift-Away model, and I do the same. Also, I’ve started labeling my storage box with the type of bags I have so I don’t mix them up. Super handy!
Thanks for your feedback! The Miele Classic C1 is a great vacuum. Make sure to use the Miele GN AirClean filter bags for the best performance. You might also want to check the air filter regularly for optimal suction.
I actually modified the steps a bit for my old Electrolux vacuum. I skip the step where you prepare the new vacuum bag since I just keep them in the box. I just pop the new bag in as soon as I take the old one out. It saves me time during the next clean!
That’s a smart approach! Keeping the new bags close at hand can definitely streamline the process. It’s all about finding what works best for you and your vacuum model!
Could someone recommend a good vacuum bag for a Bissell PowerForce? I’ve had trouble finding ones that fit well and don’t tear easily.
For the Bissell PowerForce, I recommend the Bissell 3210 replacement bags. They fit perfectly and are quite durable. You can often find them at local retailers or online!