
The iRobot Braava Jet 240 is a smart and efficient mopping robot that simplifies floor cleaning, making it a valuable addition to any home. To maintain its outstanding performance, it’s essential to regularly replace the cleaning pads. This step-by-step guide will provide you with clear instructions on how to easily and effectively change the cleaning pads on your Braava Jet 240, ensuring that your robot continues to deliver the best cleaning results with minimal effort.


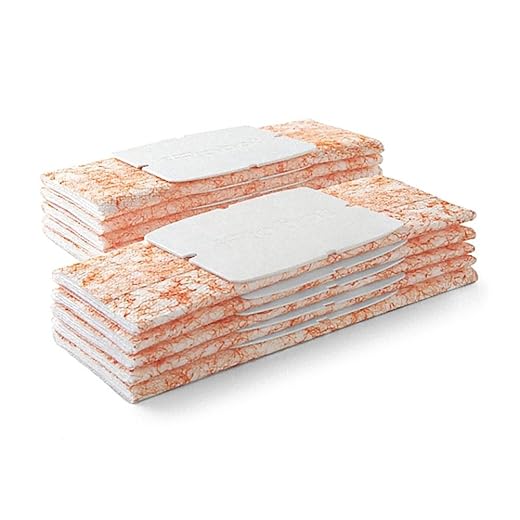
Prepare your replacement cleaning pads by ensuring they are clean and ready for use. Check that you have the correct size and type that fits your mop. If you’re not sure which pads to use, consult the manufacturer’s guidelines or look for compatibility labels on the packaging. Having these pads on hand will save you time and frustration when you’re ready to start your cleaning task. Lay the new pads out nearby so they are easily accessible when you need them.
Gather a damp cloth to wipe down the mopping surface if necessary. Before you start mopping, assess the area for any dust, dirt, or debris that may require a quick cleanup. If the surface looks particularly grimy, dampen the cloth with water and wipe it over the area you plan to mop. This step helps ensure that your cleaning process is effective and that you won’t just be spreading dirt around. After wiping the surface, allow it to dry briefly before attaching the new cleaning pads to your mop. This preparation will enhance the efficiency of your cleaning routine.

Power Off the iRobot Braava Jet 240
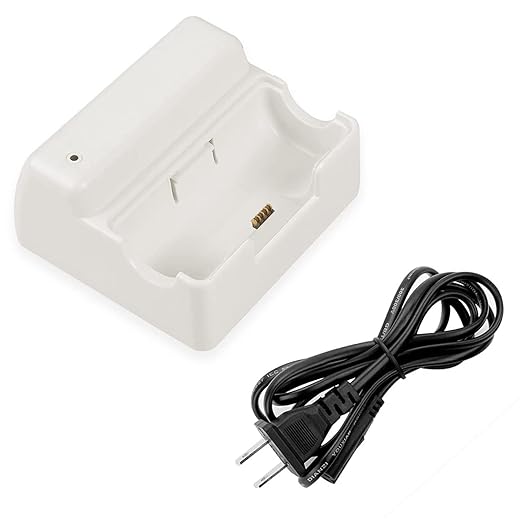
Ensure that the iRobot Braava Jet 240 is powered off before performing any maintenance or cleaning tasks. This step is crucial for your safety and to prevent any accidental activation of the device. Start by locating the power button, usually situated on the top of the robot. Press and hold the power button until you hear a beep, indicating that the device has shut down completely. If the Braava Jet 240 is currently docked, gently lift it off the charging station. Make sure to handle it with care as you remove it, avoiding any unnecessary force.
Check that the device is completely powered off by observing the LED indicators. If the lights are off, you can proceed with your next steps safely. Consider storing the Braava Jet 240 in a dry, safe location until you are ready to use it again. Remember, keeping it powered off not only ensures your safety but also helps conserve battery life, so you’re ready for your next cleaning session. If you plan to clean or maintain the device, make sure you follow these steps carefully to ensure a smooth and safe process.
Remove the Old Cleaning Pad
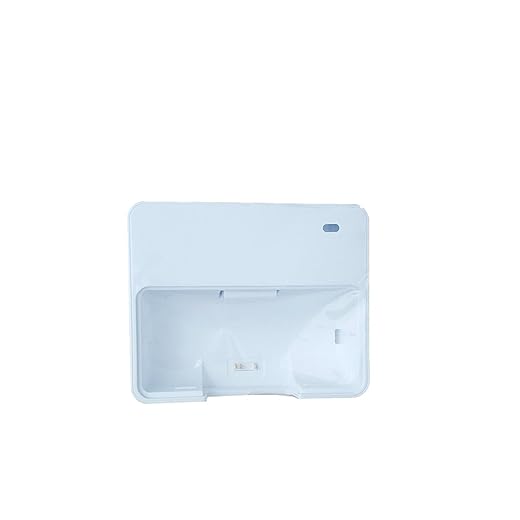
Locate the cleaning pad on the bottom of your iRobot Braava Jet 240. Flip the device over gently, ensuring you have a stable surface to work on. Notice the rectangular pad secured firmly to the base; this is the cleaning pad that you’re going to remove. Check that you can see the edges of the pad clearly, as it should be slightly raised from the surface of the device. Knowing where the pad is will help you avoid any confusion during the removal process.
Pull the existing cleaning pad away from the device gently to detach it. Grip the pad at one of the corners and lift it slowly, making sure not to yank or force it off. If you feel any resistance, double-check that you’re pulling from the correct corner. Once you’ve pulled it free, set it aside for disposal or washing, depending on its condition. You’ll now have a clean surface ready for a fresh cleaning pad, enhancing your Braava’s efficiency in keeping your floors spotless.
Attach the New Cleaning Pad
Take the new cleaning pad and align it carefully with the Velcro surface located on the bottom of your Braava Jet 240. Make sure the pad is oriented correctly; the cleaning side should face down toward the floor. Position the pad so that it covers the entire Velcro area, ensuring no edges are left hanging. You can check that the pad fits well by looking for even spacing around the edges.
Press down firmly on the cleaning pad to ensure it adheres securely to the Velcro. Use the palm of your hand to apply even pressure across the entire surface of the pad, paying extra attention to the corners. This helps prevent any lifting during operation. For best results, repeat this action a few times to guarantee a strong bond. Remember, if you’re using a wet pad, make sure it’s slightly moist for optimal cleaning performance. If you notice any loose edges after pressing, simply reinforce them by pressing down again.
Power On and Test the Device
Power on the iRobot Braava Jet 240 by pressing the power button located on the top of the device. Once the power is on, you will see lights indicating the battery status and the mode you’re in. Next, check that the cleaning pad is securely attached to the device. Gently pull on the cleaning pad to ensure it is snugly fit and doesn’t come off easily. If it feels loose, detach it and reattach it, making sure that the hooks on the back of the pad click into place firmly.
Run a quick test by choosing the appropriate cleaning mode. Press the “Clean” button to initiate a short cleaning cycle. Watch as the iRobot Braava Jet 240 moves around your space, making sure the cleaning pad is functioning properly. If you notice any unusual sounds or if the robot stops unexpectedly, pause the cycle and check for any obstructions or issues with the pad. Ensure that it is dampened properly if you’re using the mopping feature. You can also observe the cleaning pad after the test; it should appear dirty, indicating that it’s effectively picking up debris from your floors.
Final Thoughts on Replacement
In conclusion, replacing the cleaning pads on your iRobot Braava Jet 240 is an easy yet crucial task that can greatly improve your robot’s performance. By keeping your pads fresh and clean, you not only enhance the efficiency of your device but also ensure that your floors remain spotless. So, make it a routine to check and change your pads regularly, and enjoy the benefits of a cleaner home with minimal effort!
Essential Supplies Needed

I followed this guide last week to replace the pads and it worked like a charm! My Braava Jet 240 is back to cleaning like new. Super easy process!
Glad to hear that! The Braava Jet 240 is such a handy little device once you keep it maintained. Happy mopping!
After I replaced the pads, I ran it on my kitchen floor, and wow! It picked up so much dirt that I didn’t even notice was there. Totally recommend doing this regularly!
That’s awesome! Regular maintenance really does make a difference. Keep up the great work!
Quick question! When removing the old cleaning pad, is there a specific way to pull it off or just yank it straight out? I’m worried I might break something.
Anyone else having issues with the device not powering on after changing the pads? I followed all the steps, but it seems stuck. Help!
Make sure the battery is charged and properly seated. If it still doesn’t turn on, try resetting the device by removing the battery for a few minutes.
Pro tip: I always clean the mop head after using it, just to extend its life! It really helps keep things fresh and working well. Anyone else do this?
Hey, can anyone share some advanced tips for getting the most out of the Braava Jet 240? I feel like I’m missing out on some cool features. Thanks!
Does anyone have recommendations on the best cleaning pads for the Braava Jet 240? I want to make sure I’m using the most effective ones!
I tried following the steps, but I had a hard time getting the new cleaning pad to stick. It keeps coming loose! Any advice on what I might be doing wrong?
It sounds like you might not be pressing it on firmly enough. Make sure the pad clicks into place. You could also try cleaning the attachment area to ensure it’s free of debris.