
This step-by-step guide outlines the essential procedures for properly storing a Milwaukee vacuum when it is not in use, helping to maintain its functionality and extend its lifespan. Key steps include ensuring the vacuum is cleaned and emptied of debris, disconnecting any attachments, and securely winding the power cord to prevent damage. Additionally, it emphasizes the importance of storing the vacuum in a dry, temperature-controlled environment to avoid moisture and extreme conditions that could affect performance. By following these instructions, users can ensure their Milwaukee vacuum is always ready for the next project.


- Unplug the Milwaukee vacuum from the power source to ensure safety.
- Check that the cord is completely detached from any electrical outlet.
- Avoid any risk of accidental activation by ensuring the vacuum is powered down.
- Store the vacuum in a dry, cool place after unplugging for optimal maintenance.


Empty the Dust Container
Remove the dust container or bag from your vacuum cleaner by pressing the release button or latch. Hold it over a trash bin and carefully empty the contents, ensuring that no dust escapes into the air. Inspect the container for any debris that might be stuck and clean it if necessary. Reattach the dust container or bag securely to maintain optimal suction power for your next cleaning session.
Clean the Filter
Check the vacuum filter regularly, ideally every few months or more often if you have pets or heavy dust. Remove the filter from the vacuum according to the manufacturer’s instructions, being careful not to damage any components. Rinse the filter under warm water, allowing it to air dry completely before reinserting it. Replace the filter according to the manufacturer’s guidance to ensure optimal performance and longevity of your vacuum.
Inspect for Damages
- Examine the vacuum for any visible damages or wear.
- Inspect the body of the vacuum for cracks or dents that may affect performance.
- Look closely at the power cord; check for frayed areas or exposed wires that could pose safety hazards.
- Test all attachments and hoses for any tears or blockages that need addressing before storage.
Wrap the Cord
Wrap the power cord neatly around the designated hooks. Start at the base of the device, looping the cord in a consistent pattern to avoid tangling. Secure each loop with a slight pull to ensure it doesn’t unravel. If no hooks are available, coil the cord in a figure-eight pattern, which helps prevent kinks and damage. Keep the wrapped cord out of high-traffic areas to avoid accidental tripping or tugging.
Store in a Dry Place
Choose a storage location that remains consistently dry and avoids temperature extremes. Follow these guidelines:
- Inspect the area for any signs of moisture, such as dampness or mold.
- Keep the vacuum away from basements or attics, as these areas tend to accumulate humidity and experience temperature fluctuations.
- Store the vacuum in a climate-controlled space, like a closet or utility room, where conditions are stable.
- Avoid placing the vacuum near windows, doors, or vents that may expose it to drafts or direct sunlight.
By ensuring a dry and stable environment, you help protect your vacuum’s components from moisture damage over time.
Use a Protective Cover
Choose a protective cover or bag that fits your vacuum securely. Place the vacuum inside the cover or bag, ensuring all parts are enclosed. Store the covered vacuum in a dry, clean area to prevent dust and dirt accumulation. Check the cover periodically for any signs of wear or damage to maintain optimal protection.
Keep Away from Direct Sunlight
Store your vacuum in a cool, shaded area away from direct sunlight. Ensure that the location you choose has consistent temperature control to help prevent overheating. Avoid placing it near windows or doors where sunlight can directly hit it. Keep the vacuum in a closet or storage room to protect it from UV exposure, which can lead to the deterioration of plastic components over time.
Check Periodically
Inspect your vacuum periodically during storage to ensure it remains in good condition. Look for any signs of wear, damage, or dust buildup. If you notice any issues, such as a clogged filter or frayed cord, address them promptly to prevent further problems. Keep the vacuum clean and stored in a dry place to help maintain its longevity.
Maximize Longevity and Efficiency
In conclusion, by following these simple storage steps, you can keep your Milwaukee vacuum in top-notch condition, ready for action whenever you need it. Remember to clean it thoroughly, detach the accessories, and choose a dry, cool place for storage. With a little care, your vacuum will serve you well for years to come. Happy cleaning!
Essential Supplies Needed


Storage Best Practices
Step-by-Step Guide to Maximizing Your Milwaukee Vacuum’s Performance
- Familiarize Yourself with the Controls: Before you start using the vacuum, take a moment to understand the buttons and settings. Look for the power switch, suction settings, and any additional features that may be specific to your model
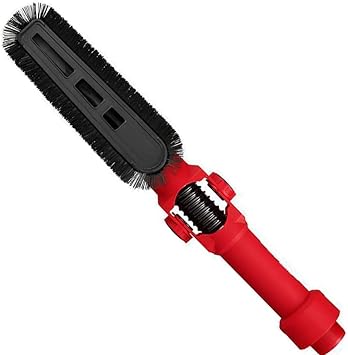
- Select the Right Attachment: Depending on the surface you’re cleaning, choose the appropriate attachment. Milwaukee vacuums often come with various tools like crevice nozzles or brushes for different cleaning tasks. Using the right attachment will ensure you get the best results!
- Check for Proper Bag or Filter Installation: If your Milwaukee vacuum uses bags or filters, make sure they are correctly installed and not full. A clean bag or filter is essential for optimal suction and performance
- Maintain a Steady Pace: As you vacuum, try to maintain a steady pace. This not only helps in picking up dirt and debris effectively but also prevents you from missing spots
- Empty and Clean Regularly: After your cleaning session, don’t forget to empty the dust container or replace the bag if needed. Regular maintenance keeps your vacuum running smoothly and extends its lifespan
- Enjoy your cleaning experience with your Milwaukee vacuum!
Common Questions About Milwaukee Vacuums
Yes, Milwaukee vacuums are designed for specific types of debris and messes. They offer a range of models tailored for different applications, such as construction sites, woodworking, and general cleaning. For example, some vacuums are specifically built to handle fine dust from sanding or drywall work, while others can tackle larger debris like wood chips or metal shavings. Additionally, certain models may come with specialized filters and attachments to enhance their effectiveness for particular messes. Always check the specifications and features of the vacuum you’re considering to ensure it meets your specific cleaning needs!
When comparing Milwaukee vacuums to other brands, you’ll find that they generally perform very well in terms of suction power. Milwaukee vacuums are designed with high-performance motors that provide strong suction, making them efficient for both professional and DIY tasks. Many users report that Milwaukee vacuums deliver consistent suction, even when collecting larger debris or fine dust.
However, it’s important to note that suction power can vary across different models within the Milwaukee line and when compared to other brands. For instance, some brands like Hoover or Shark might excel in specific categories such as home cleaning or lightweight models. In contrast, Milwaukee often focuses on heavy-duty performance tailored for construction and industrial environments.
When choosing a vacuum, consider the specific model’s specifications, including air watts or CFM (cubic feet per minute), as these metrics provide a clearer picture of the vacuum’s suction power. Ultimately, Milwaukee vacuums hold their own against competitors, especially if you’re looking for robust performance in demanding conditions.
You can find customer reviews and feedback on Milwaukee vacuums in several places. Here are some reliable sources:
- Retail Websites: Websites like Amazon, Home Depot, and Lowe’s often have customer reviews on product pages where you can see what other users have experienced with Milwaukee vacuums.
- Manufacturer’s Website: The Milwaukee Tool website may feature reviews and testimonials directly from customers who have purchased their vacuums.
- Review Aggregators: Websites like Consumer Reports or Trustpilot compile reviews from various sources, offering a broader perspective on customer satisfaction.
- Social Media: Platforms like Facebook, Instagram, and Reddit can provide real-life feedback and discussions about Milwaukee vacuums from users.
- YouTube: Many users share their experiences through video reviews, which can give you a visual understanding of the product’s performance.
By exploring these sources, you’ll get a comprehensive view of how Milwaukee vacuums perform in real-world use.
Hi there! Sorry to hear you’re having trouble with the dust container. Make sure to check if the seals are clean and free from debris. Sometimes a little built-up dust can prevent it from seating properly. If it still doesn’t fit, you might want to reach out to Milwaukee support for more specific troubleshooting tips. Hope that helps!
I’ve been storing my Milwaukee vacuum like this for a while now, and I gotta say, it’s made a huge difference. I even noticed that I’m saving more time during cleanups because it’s always ready to go! Just wanted to share my success with everyone!
That’s awesome to hear! We love success stories like yours! It’s always nice when a little maintenance makes such a big difference in efficiency. Thanks for sharing, and keep up the great work!
Quick question about the protective cover. Do you recommend a specific type or brand to use? I want to make sure I get one that fits well and actually protects my Milwaukee vacuum. Any suggestions?
Great question! For a protective cover, look for one specifically designed for Milwaukee vacuums or one that fits the dimensions of your model. Brands like Custom LeatherCraft or even generic covers can work well. Just ensure it’s breathable to avoid moisture buildup. Hope this helps!
I just wanted to say thanks for this guide! I followed all the steps, and my Milwaukee vacuum is now stored perfectly. Cleaning the filter was a game changer; it runs so much better now. I didn’t realize how important that was! Great tips!
Thanks for the kind words! We’re so glad to hear that the guide helped and that your vacuum is running better now. Keeping the filter clean really does make a big difference! Happy cleaning!
Hey, I followed all the steps from this guide, but I still have some trouble with the dust container not seating right when I put it back. It keeps popping out while I’m trying to store it. Any tips on how to fix that? I don’t want it to get damaged!