
This step-by-step guide on setting up the Eufy BoostIQ RoboVac 11S provides clear and concise instructions to help you get your robotic vacuum ready for use. It covers essential tasks such as unboxing, charging the vacuum, connecting it to your home Wi-Fi, and using the accompanying app for optimal performance. By following this guide, you will learn how to efficiently configure your RoboVac to enhance your cleaning routine and maintain a tidy home with minimal effort.


Carefully lift the Eufy RoboVac out of its packaging. Grip the sides of the box and gently tilt it to allow the vacuum to slide out smoothly. Avoid pulling on any cords or components that may be attached. Once removed, place the RoboVac on a flat, clean surface.
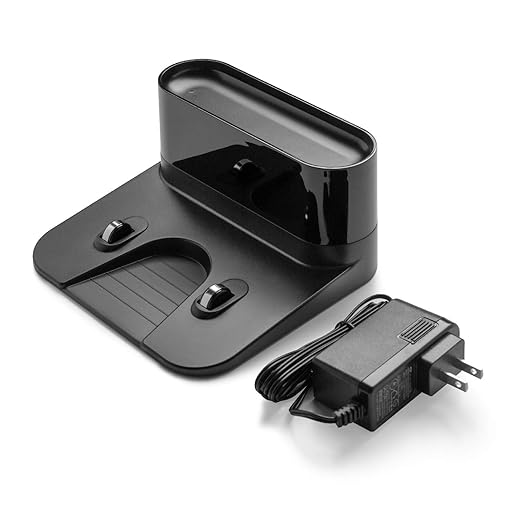
Inspect the vacuum for any visible damages. Look for scratches, dents, or cracks that may have occurred during shipping. Ensure that all components are included in the box. Check for the following items:
- Eufy RoboVac
- Charging dock
- Power adapter
- Remote control
- User manual
If any items are missing or damaged, contact the retailer or Eufy customer support for assistance.


Position the Charging Dock
Select a location for the charging dock that is easily accessible to a power outlet. Look for a spot in your home or office that minimizes clutter and obstacles. Consider placing the dock on a flat surface, such as a table or shelf, where it won’t be accidentally bumped or knocked over. Ensure that at least 1.5 feet of clearance is present on either side of the dock. This space allows your device to dock seamlessly without interference from nearby objects, such as books, lamps, or decorative items that could obstruct its path.
Establish a clear area in front of the charging dock, ensuring there’s at least 4 feet of space. This distance allows your device to maneuver in and out of the dock without hindrance. For example, if your charging dock is near a wall, make sure there’s enough room for your device to glide into position without getting stuck. If you have pets or children, position the dock in an area where they won’t accidentally knock it over or create a tripping hazard. By following these guidelines, you’ll create a functional and safe docking station that enhances your charging experience.
Plug in the Charging Dock
Connect the charging dock to the power outlet using the provided power adapter. Locate the power adapter that came with your charging dock and plug one end into the charging dock’s power input. Then, take the other end of the adapter and insert it into a nearby power outlet. Make sure the outlet is functional; you can check this by plugging in another device.
Ensure that the charging dock is powered on and the indicator light is lit. Look for the power button on the charging dock, usually located on the side or the back. Press the button firmly to turn it on. Observe the indicator light; it should illuminate in a specific color (often green or blue) to signify that the dock is powered and ready for use. If the light does not turn on, double-check the connections and ensure the outlet is active.
Prepare the RoboVac
Remove any protective tape from the RoboVac to ensure it operates smoothly. Check all sides of the device for tape or stickers that may have been applied during manufacturing. Carefully peel them off, taking care not to damage any components. This step is essential as it prevents obstructions that could affect the RoboVac’s performance.
Press the power button to turn it on and initiate the setup process. Once the device is powered up, place the RoboVac on the charging dock to allow it to charge fully before the first use. Ensure the charging dock is connected to a power source. Allow the RoboVac to charge for about 4-5 hours for optimal performance. This initial charging period ensures that your RoboVac is ready to tackle your cleaning tasks efficiently.
Connect the Remote Control
Insert the batteries into the remote control if required. Locate the battery compartment on the back of the remote, usually secured by a sliding cover or small screws. Open the compartment and check for the correct battery orientation, which is often indicated by a diagram inside. Place the batteries in the correct position and close the compartment securely. If your remote came with batteries included, skip this step and proceed to the next.
Press the power button to ensure the remote is functional. Observe the indicator light; it should illuminate, confirming that the remote is powered on. Use the remote to control your RoboVac, navigating the various buttons to start, pause, or stop cleaning. Additionally, set up scheduled cleanings by accessing the scheduling feature on the remote. Follow the prompts displayed and select your preferred days and times for the RoboVac to clean, ensuring your living space stays tidy and fresh according to your schedule.
Final Setup Tips and Tricks
In conclusion, you’ve now successfully set up your Eufy BoostIQ RoboVac 11S, paving the way for a cleaner, more convenient home. Remember, regular maintenance and timely charging will keep your RoboVac running at its best, allowing you to enjoy a hassle-free cleaning experience. Embrace the freedom of automated cleaning and watch your space transform with minimal effort! Happy vacuuming!
I took a slightly different approach when I set up my Eufy BoostIQ RoboVac 11S. Instead of just placing the charging dock on the floor, I put it on a small table to keep it out of the way of my pets. It really helps to avoid any accidental bumps or spills! Plus, it looks a little nicer in my living room that way. Anyone else tried this? Would love to hear your experiences!
Has anyone else thought about adding smart home integration with their RoboVac? Like, maybe using it with Alexa or Google Home for voice commands? I think that could be a cool upgrade to make cleaning even easier. What do you guys think?
Absolutely! Smart home integration can take your cleaning routine to the next level. It’s super convenient to control your RoboVac with just your voice. Thanks for bringing that up!
Using the Eufy BoostIQ RoboVac 11S has been a game changer for my busy household. I can set it up to clean while I’m at work, and when I come home, the floors are spotless. It’s especially handy during allergy season because it picks up so much dust and pet hair. Highly recommend giving it a try if you’re always on the go!
That’s a great idea! Elevating the charging dock not only keeps it safe from pets but also makes it more accessible for you. Thanks for sharing your personal touch!